A Shot in the Dark
by Brett Florens
Date: Saturday 15 January 2002.
Assignment: Wedding
Check list: Fuji Superia 100 8 Rolls; Fuji Reala 400 4 Rolls; Fuji Superia 400 5 rolls; Ilford XP2 Black & White 3 rolls; Nikon F4 for color; Nikon F90 for Black & White.
We arrive at the bridal preparation room and start shooting details. My Nikon is F4 loaded with the 400 Superia as I’m shooting indoors with window light and I’ll be able to get a shutter speed of around 1/125sec. Using my Nikon F90 loaded with the 400 Black/White, I shoot the bridesmaids’ activities as well as the make-up being applied. The bride is now ready for her portraits, I have shot 22 images of the details on the color roll so far, and now I need to change to the Fuji Reala as the skin tones are better than on the Fuji Superia (it is prohibitively expensive, hence the two types I am carrying). I don’t want to waste the remaining 14 frames on the roll, so I manually rewind the film to just before the tongue is swallowed by the cassette. I make a mental note that I have shot 22 frames before putting the partially used film into my pocket. I shoot around 18 carefully lit and posed images on the Reala before repeating the process of manually rewinding the film and putting that one into my other pocket. Off to the church, and I shoot some more photojournalist-styled images with the F90 and the Ilford B/W. I have replaced the Reala with the partially used Superia and to advance the film to the correct place, I set my camera to manual, put it on the highest shutter speed and smallest aperture, hold my hand in front of the lens to ensure no stray light enters the frame, and shoot off 23 frames to ensure that I don’t have any double exposures. I fire off the remaining 13 images of the bride getting out of the car and a portrait with her father. As I rush into the church, I insert a roll of Superia 400 as I need a high iso inside the dark church. The ceremony goes well, with me firing off around 30 images of color on the 400 and 15 images of B/W. I now prepare for the family formal on the Superia 100 as we are shooting outside with good light. I use a roll and a half for that and as before, I manually rewind the film to replace it with the Reala I had used for her portraits. I now need to shoot the bridal couple together on the best film available. Same procedure. The daylight fades fast, and we concede defeat and head to the reception. The first dance is a little more complicated, as I like to shoot it in B/W with available light only. However, on 400 I battle with slow shutter speeds. As film uses a chemical process to develop, I can push it 2 stops, technically underexposing it, but recovering in processing. It does resemble a form of sand art with the grain, but hey, it’s art! I would need to remember to let the lab know which roll I would like pushed and by how many stops...
Oh my word, I am very grateful for the digital revolution that has, among many things, enabled us to shoot a different iso by changing a setting in mere seconds! We now have the ability to literally shoot in the dark and the hardware available to us is so advanced that it has opened a whole new avenue for us to express our creativity. Not only have the cameras advanced, but new lighting solutions have emerged, with costs that are within reach of most professional photographers. I’m no longer afraid of the dark, in fact I embrace it and use the opportunity to create images for my clients that they never dreamed possible. These are not only my wedding clients, but also my commercial, fashion, and portrait clients. Once you learn to trust your camera’s capabilities, which may take a while because the concept of shooting smooth images at 12800 iso or higher would not have been possible a few years ago, you will find infinite ways to express yourself.
I recently received my new Nikon D4s, an incredible piece of technology that can produce astonishing quality images at very high iso’s. I channeled my enthusiasm for my new acquisition into testing the camera and various lighting sources to see what images I could create. I think we need to do this more often, especially for new techniques, as it instills confidence in our own ability once we know we have done it before. The possibilities and combinations are as diverse as the different styles photographers have. This is fantastic, as you can create images that resonate with you and your carefully nurtured brand. The trick is to know the different properties of each light source and the emotion it evokes. The Ice Light from Westcott is a soft light that emulates window light, where as the Manfrotto LED panel, is a little harder, almost like a beauty dish on a strobe. An LED torch such as the Fenix, which is essentially a torch designed for domestic use, produces a rather harsh light emulating a bare bulb strobe, creating razor sharp shadows and an editorial feel. Then you can use colored gels to color the light source and create a very specific mood. More options would be shooting through transparent objects such as a prism or wine glass to create interesting foreground textures to your images. We haven’t even begun to explore the combination of speedlights or off-camera strobes and dragging the shutter to allow ambient light onto the sensor. That would take a whole new piece. In this article I am going to stick to ambient or continuous lighting sources, as it is a great introduction to low-light shooting because you are able to see what your results are going to be and then adjust your lighting or subject positions accordingly.
The key to low-light or night shooting is to find a location that has some ambient light around that would be interesting when out of focus. This now includes many areas that might not necessarily look good during the day when lit by the sun. I did mention cameras earlier, but need to reiterate that some cameras perform better under lower light than others. If you are shooting weddings and social functions, it will make sense to invest in such a camera. A fast lens, such as the 85mm f1.4 or 1.8 works really well. This also increases your chances of creating interesting Bokeh (Google it), adding to the chances of creating a successful image.
Shoot wide open to create an image with a shallow depth of field, again to beautify the background. Choose an iso that will give you a shutter speed that is the same or higher than the focal length of the lens that you are using. This reduces the amount of motion blur caused by trying to keep your camera steady during the shot, unless you expressly want to have that motion in your image. The beauty of being in a creative field is that you are able to interpret and express things in your own way.
Colors at night are very interesting. The advantage of night/low-light photography is that it is easier to control the intensity, direction, and color of the light falling on your subject. If you gel the light source that illuminates your subject and then correct the white balance either in camera or in post-production to compensate for the color, you essentially change the perceived color of everything else not illuminated by your light source. This offers even more options to your repertoire. The use of a grey card in this instance may be of benefit, as the auto-white balance settings of even the most advanced cameras will be fooled by the multiple colors of the ambient and added light sources. That being said, perhaps you are not looking for perfect skin tones and are looking for a more surreal look, in which case you wouldn’t correct the white balance at all.
There are so many possibilities available to you, with only your imagination limiting your creativity. It is important to set aside a night or two to experiment and create. My advice is to collaborate on a shoot with a hair and make-up artist as well as a clothing designer. This will be mutually beneficial. Offer images to the participants in return for their contribution. Approach the shoot as a collaborative partnership, rather than ‘your’ shoot. This will be more attractive to the other contributors, which will elevate the chances of a successful shoot.
I have produced a video on shooting at night ,and it is available to the viewers of SPTV by emailing me on info@brettflorens.co.uk. Use the subject line “A Shot in the Dark,” and I will send you a link and password to the video.
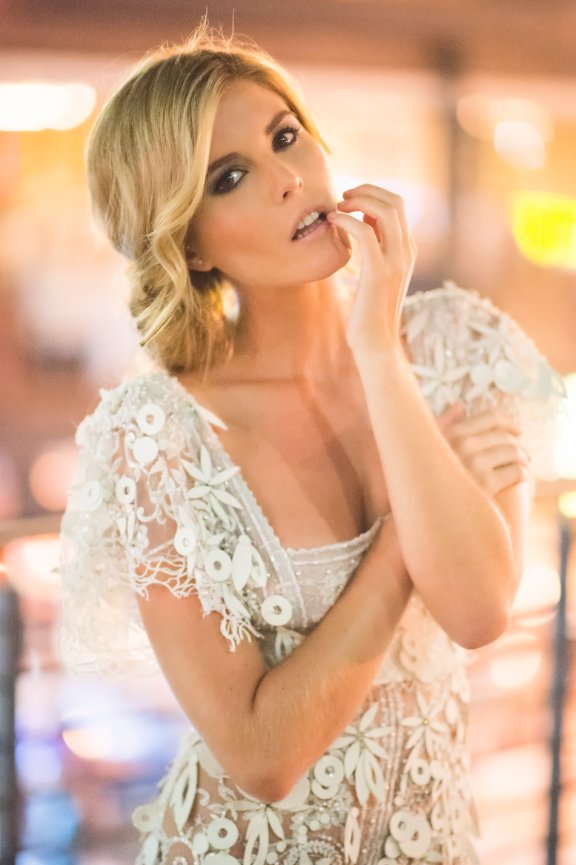
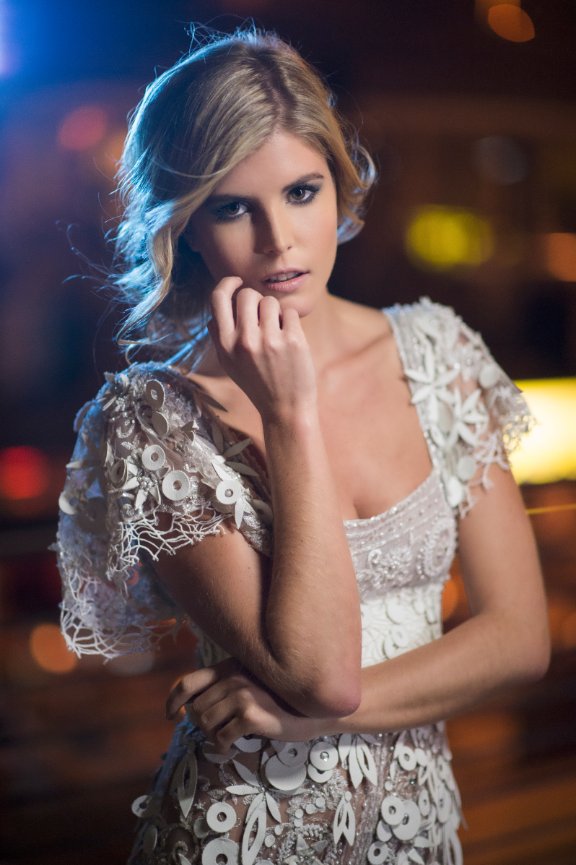
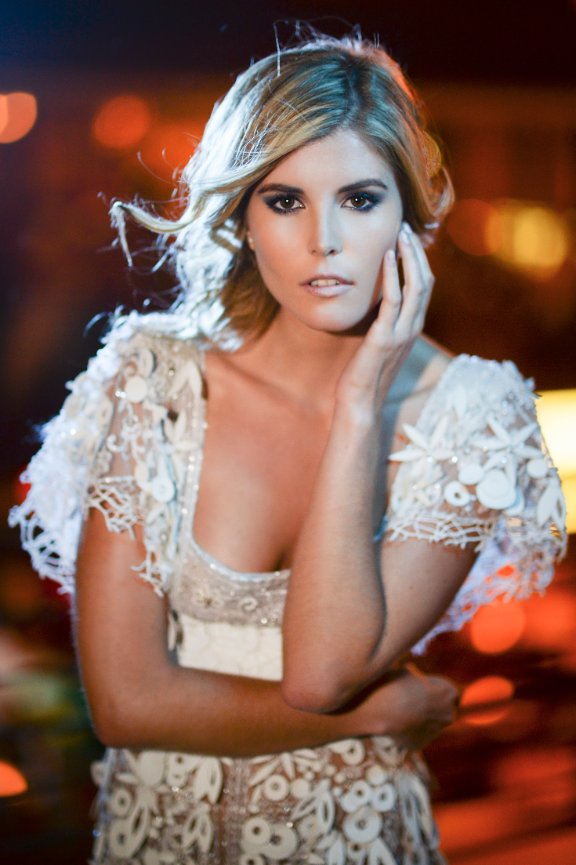
This is the first image I shot during my experiment. I looked for a background that had some interesting ambient light, which happened to be a restaurant at a local square. The lines in the background on the bottom half of the image are railings of a staircase. Shooting only with available light, I exposed for the ambient light landing on Catherine and shot off a few frames. You will notice there are multiple catch lights in her eyes, these were from an office block behind me. These also caused the various shadows on her chest. The light falling on her is flat and doesn’t create much form, however it is flattering light, with a pleasing result.
Tech Specs: Nikon D4s; Iso – 10 000; Lens – 85mm f1.4; Aperture f1.4; Shutter speed 1/125sec; Mode - A
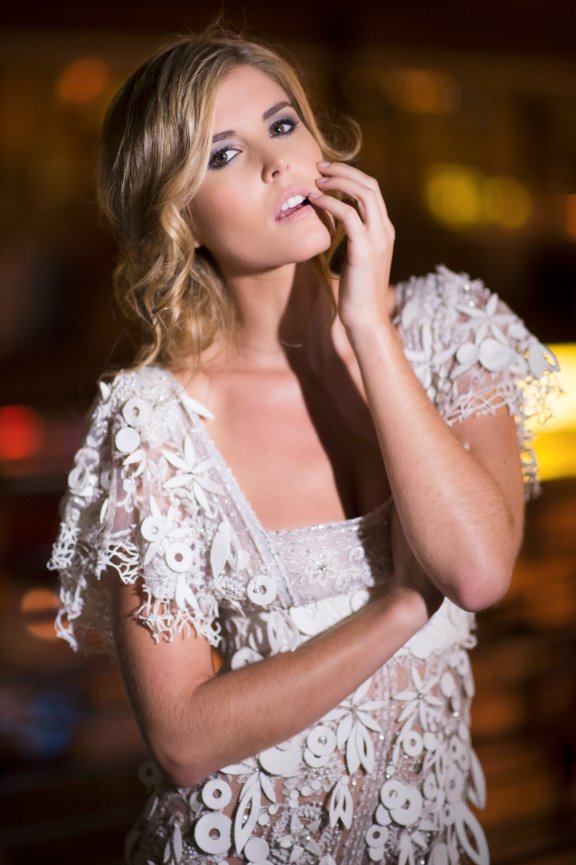
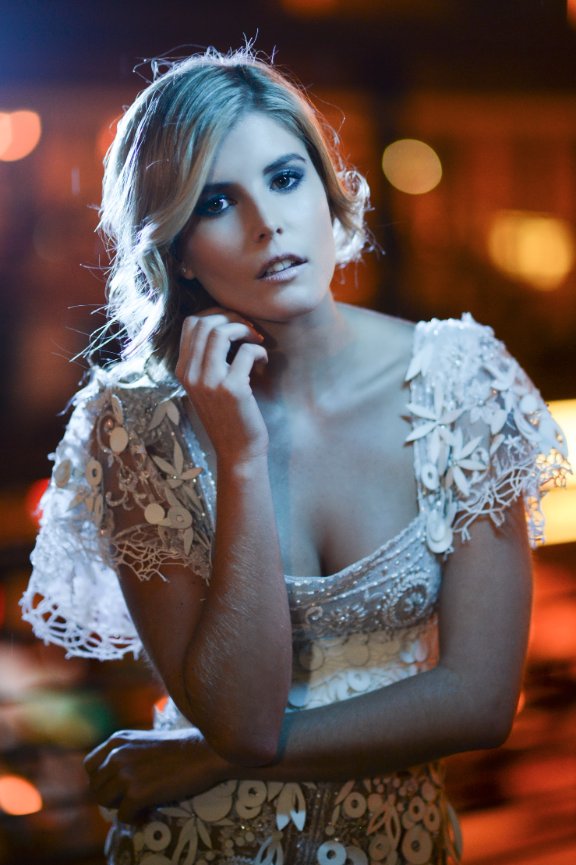
This image was lit with the Manfrotto LED. You can see that the LED had dominated the existing ambient light, revealing only one catch light in her eyes and one shadow on her chest. The shadow is relatively sharp, and as you can see from the contour on her cheek, it is shape forming. Because of the increased amount of light falling onto the subject, I was able to reduce the iso. This effectively created an image with a darker background as the LED was illuminating the model and not the background.
Tech Specs: Nikon D4s; Iso – 2 000; Lens – 85mm f1.4; Aperture f1.4; Shutter speed 1/200sec; Mode - A

This image was also shot with the Manfrotto LED. We can see the similarities in the shape of the shadows and cheek contouring. There was an additional Manfrotto LED used as a hair light to create separation between the subject and background, and making the image appear more three-dimensional. My assistant must have been holding the primarily light a little farther away from the subject this time, and the matrix-light metering system would have picked that up and adjusted accordingly by reducing the shutter speed. This allowed more of the background ambient light in, making it appear lighter than in the image without the hair light.
Tech Specs: Nikon D4s; Iso – 2 000; Lens – 85mm f1.4; Aperture f1.4; Shutter speed 1/125sec; Mode – A

By covering the hair light with a blue gel, I created a more interesting image because of the introduction of color. I have noticed lately that in images used for perfume advertising, the photographers are having fun with colors, and I took my inspiration from this.
Tech Specs: Nikon D4s; Iso – 2 000; Lens – 85mm f1.4; Aperture f1.4; Shutter speed 1/100sec; Mode – A
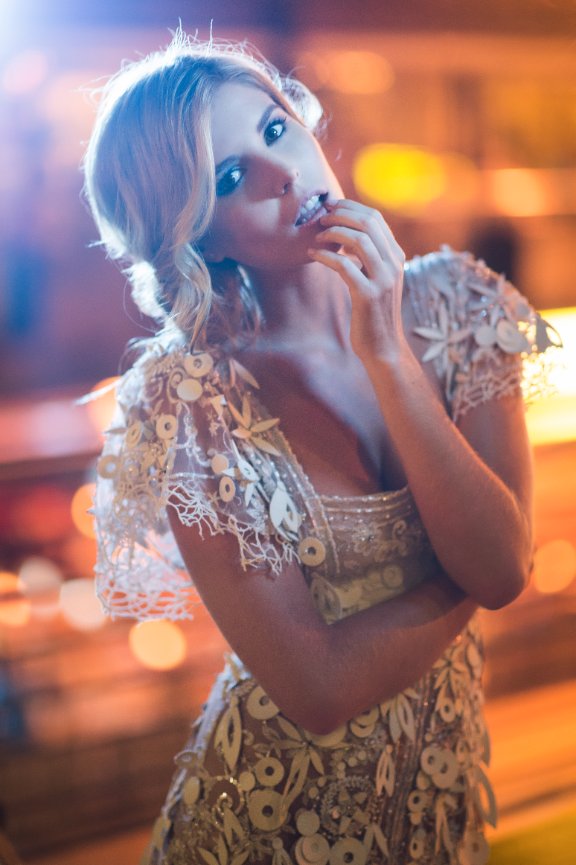
Lit with the Manfrotto LED, at a reduced output and closer to Catherine, you can see how the shadows have softened on her chest and how other ambient light is more prevalent in the image. Due to the lower output of the light source, the shutter speed has dropped and thus created an image with a lighter background. I shot this image allowing flare from the hair light to enter the frame. This, combined with the softer shadows, created a more whimsical, ethereal result.
Tech Specs: Nikon D4s; Iso – 4000; Lens – 85mm f1.4; Aperture f1.4; Shutter speed 1/80sec; Mode – A
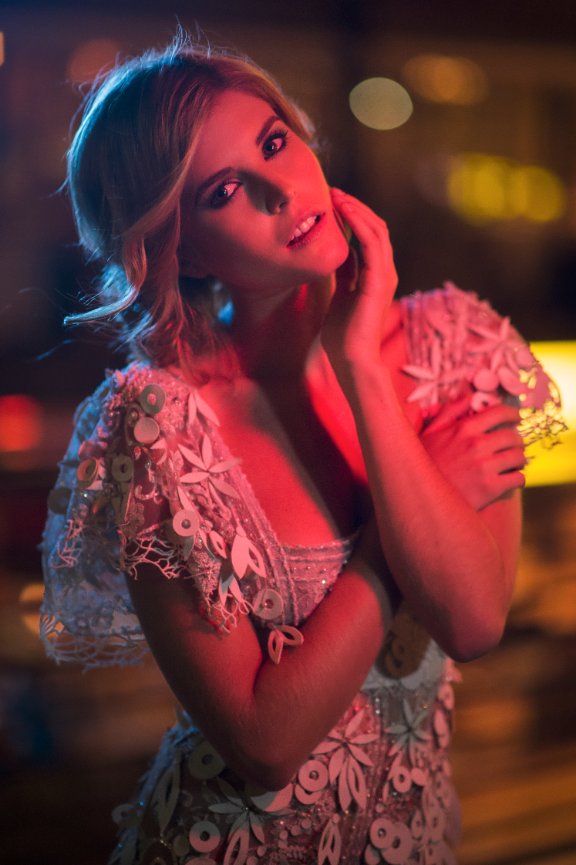
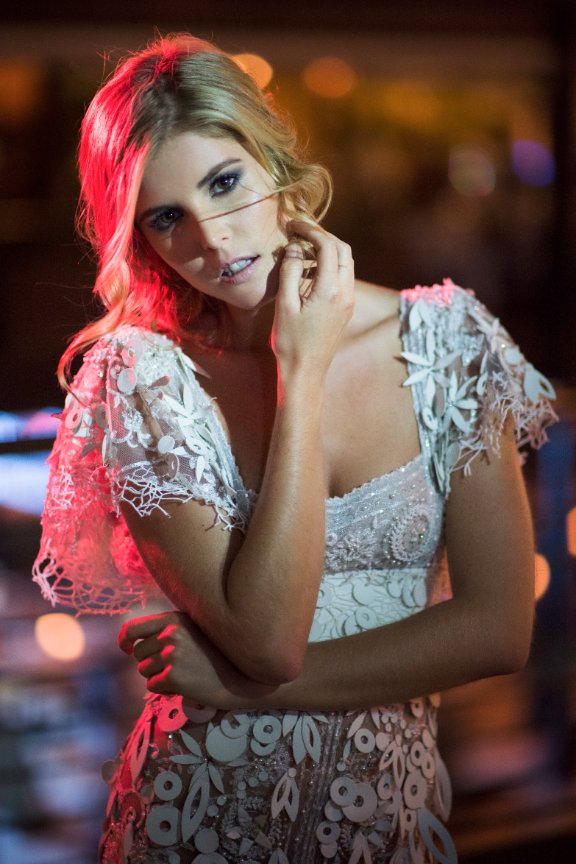
Now you can clearly see that I am experimenting with various options. This image has the Manfrotto LED covered with a red gel. Really, it’s just a different option. I had to increase the output of the primary light source, the red-gelled Manfrotto LED, resulting in a higher shutter speed and less influence of the blue-gelled hair light.
Tech Specs: Nikon D4s; Iso – 4000; Lens – 85mm f1.4; Aperture f1.4; Shutter speed 1/320sec; Mode – A

This image was created with the Wesscott Ice Light, which has a softer, window-light effect, similar to a softbox on a studio strobe. I had my assistant hold the light rather close to Catherine, creating a very pleasing result with great form and soft shadows. I hadn’t noticed how bright it was and that my shutter speed had shot up, meaning essentially that I could have dropped the iso. However, as you can see, at the high iso the image is very smooth.
Tech Specs: Nikon D4s; Iso – 4000; Lens – 85mm f1.4; Aperture f1.4; Shutter speed 1/640sec; Mode – A
With the introduction of the blue-gelled Manfrotto LED as a hair-light, I have combined the soft window-light qualities of the Ice Light with the Manfrotto LED to create an image with more depth and interest.
Tech Specs: Nikon D4s; Iso – 4000; Lens – 85mm f1.4; Aperture f1.4; Shutter speed 1/640sec; Mode – A
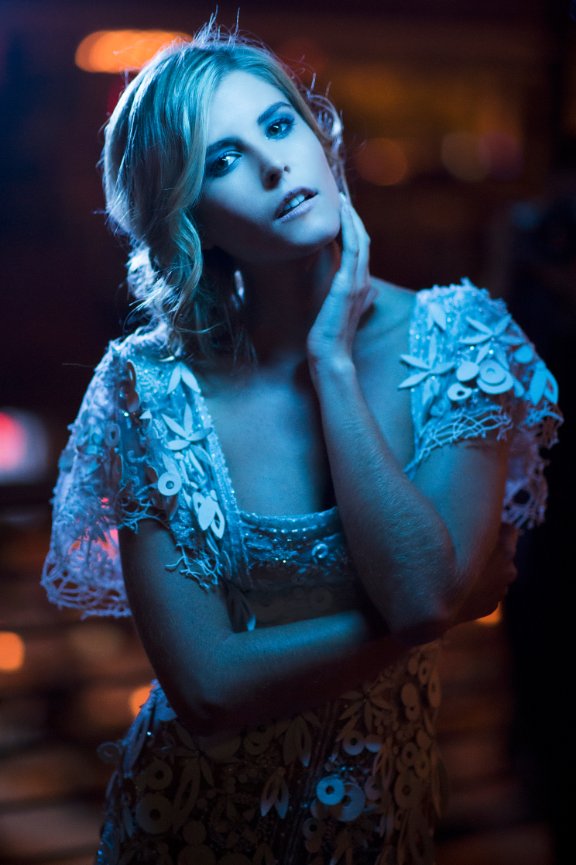
The Ice Light was covered with a blue gel for this image and the blue gelled Manfrotto LED from the previous image remained, resulting in an image intentionally created with this mythical science-fiction look and feel.
Tech Specs: Nikon Df; Iso – 640; Lens – 85mm f1.4; Aperture f1.4; Shutter speed 1/80sec; Mode – A
This image was lit with the Fenix PD35 LED, which is not actually designed for photography but rather for outdoor sporting activities. However, it works really well as a light source and comes in handy in your camera bag. You can see it has a very small surface area, and the resulting shadows are razor sharp, which would be more expected from high fashion photography. This is evident in the shadow created by Catherine’s hair across her face. The positioning of this light source is therefore critical, as it may show texture and form unnecessarily.
Tech Specs: Nikon D4s; Iso – 4000; Lens – 85mm f1.4; Aperture f1.4; Shutter speed 1/320sec; Mode – A
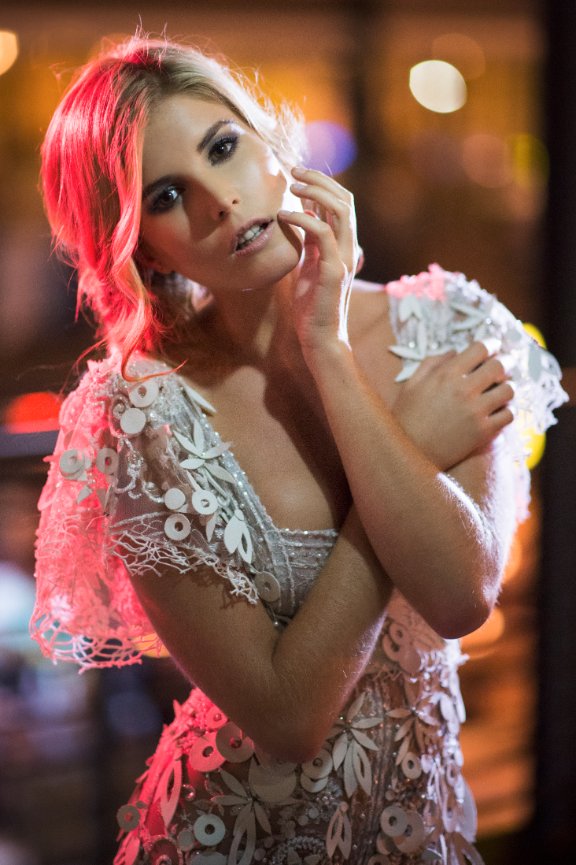
This is a three-light set up, with the Fenix LED flashlight from the front and two Manfrotto LED as hair lights, one covered in a red gel. This creates a multi-dimensional image, illustrating that you can make use of many light sources to create the desired effect.
Tech Specs: Nikon D4s; Iso – 4000; Lens – 85mm f1.4; Aperture f1.4; Shutter speed 1/200sec; Mode – A
This image was created with the Manfrotto LED, illuminating Catherine from a frontal angle, with another Manfrotto LED as a hair light. The dramatic, resolute pose and lighting create a striking image reminiscent of high-fashion images found in glossy magazines.
Tech Specs: Nikon D4f; Iso – 1600; Lens – 85mm f1.4; Aperture f1.4; Shutter speed 1/320sec; Mode – A
This image is one of my favorites. It was lit with a blue gel covering the Ice Light, creating a wonderful Rembrandtesque-light effect, that is to say, there is an illuminated triangle under the eye of the subject on the less-illuminated side of the face. The Manfrotto LED as the hair-light is also gelled with a blue gel. In post-production, I reduced the heavy blue cast by adjusting the white balance in camera raw. This reddened the background to create an image that really resonated with me.
Tech Specs: Nikon Df; Iso – 1600; Lens – 85mm f1.4; Aperture f1.4; Shutter speed 1/160sec; Mode – A
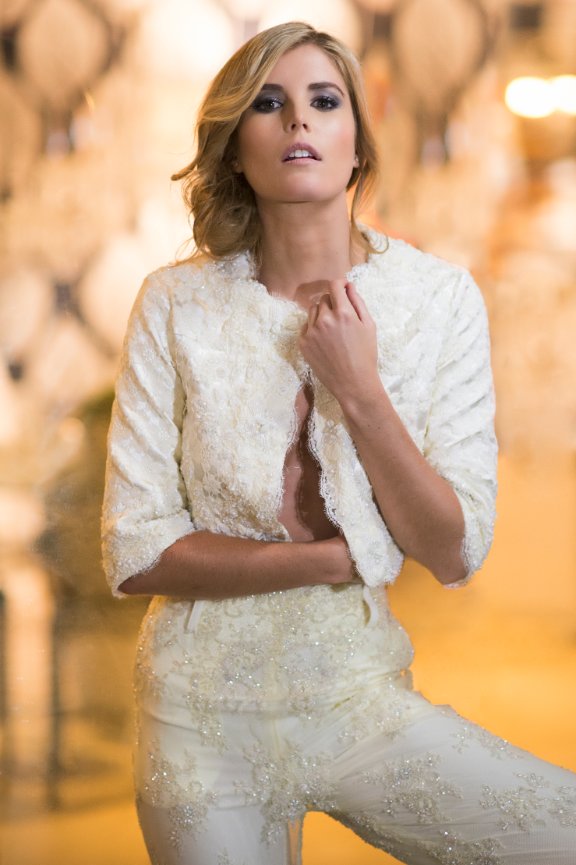
Shooting with light emanating from shop-front windows can be quite effective. This image was created with only the available light that was on location. You will be surprised at what you can create if you know what to look for.
Tech Specs: Nikon D4s; Iso – 4000; Lens – 85mm f1.4; Aperture f1.8; Shutter speed 1/250sec; Mode – A
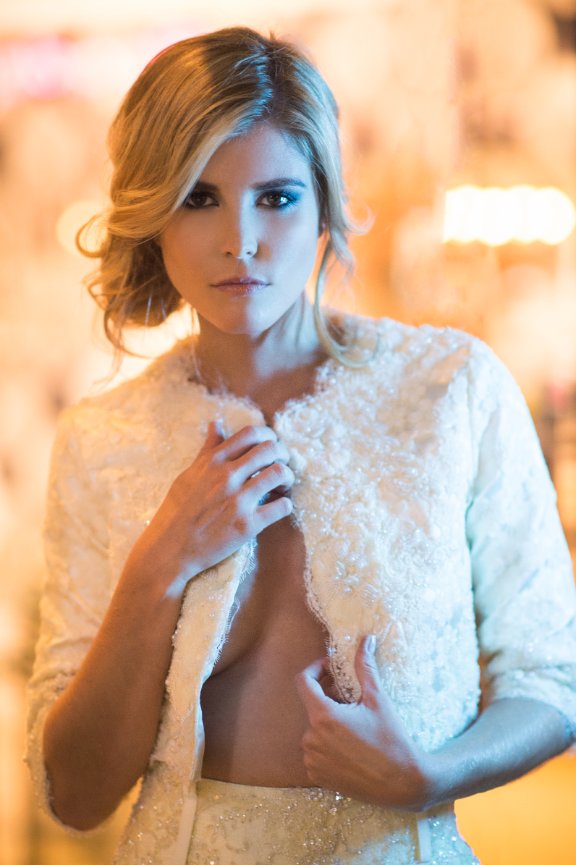
Combining the ambient light with a blue-gelled Ice Light created an image with great mood and a high-fashion feel. The side lighting enhanced the texture in the fabric, while still being soft enough to maintain the femininity of the image.
Tech Specs: Nikon D4s; Iso – 4000; Lens – 85mm f1.4; Aperture f1.8; Shutter speed 1/200sec; Mode – A
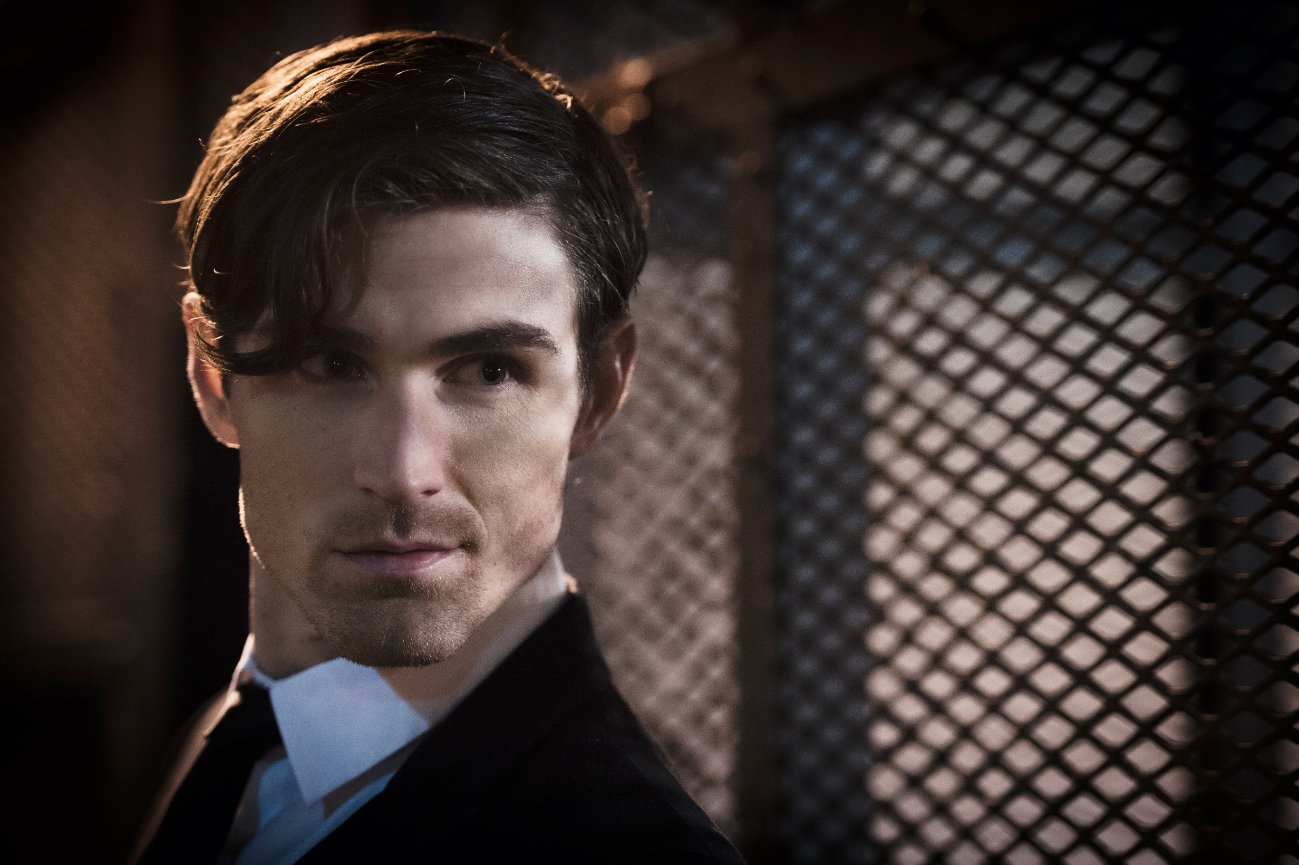
This image created on the city streets of Seattle was shot very close to steel grating which offered an interesting texture. There was enough ambient light to light the subject from the front, however I felt the image needed more. The introduction of the Manfrotto LED from behind took care of that, resulting in an image evoking a sultry, underworld feeling.
Tech Specs: Nikon D4; Iso – 4000; Lens – 70-200mm f2.8; Aperture f2.8; Shutter speed 1/320sec; Mode – A
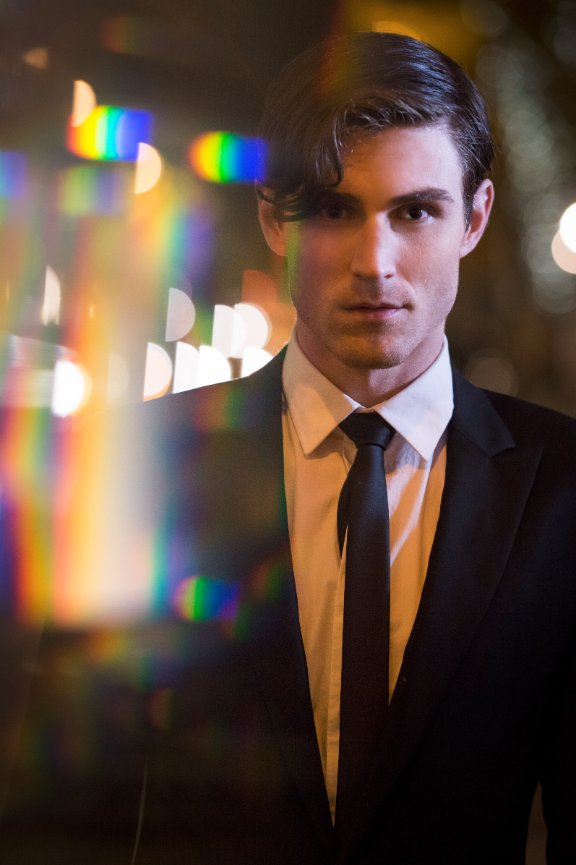
By introducing a transparent object in front of lens, here a prism, I managed to create an image with further depth and interest. Without it, the image would have been nice and acceptable, however the added dimension elevated it to an image that is compelling and out of the ordinary. This was lit from the side with the Manfrotto LED.
Tech Specs: Nikon D4s; Iso – 4000; Lens – 85mm f1.4; Aperture f1.4; Shutter speed 1/400sec; Mode – A