In my last post, I described a session in which I had to build a location studio in a church. This session is in a REAL studio. I am fortunate that there is a rental studio not far from me. The studio rental includes four Alien Bee units, a great assortment of umbrellas and soft boxes and a strip bank with grids for some of them. I usually bring just some of my studio strobes (Einstein and White Lightning units) and I always bring along a few Nikon speedlights as handy and lightweight accent lights.
These two young me wanted some images specifically to show off the results of their workout efforts. They did not want to mix them with their upcoming senior portrait sessions, so we used this session JUST for what I guess we could call their”beefcake” images?
I knew from the outset exactly how I wanted to light these guys. I know that great lighting is one of the BEST ways to separate me from all the natural light only photographers out there. Now if you are just a natural light shooter, don’t get you knickers in a twist—I KNOW you can get great images with just natural light, but having lighting tools and skills increases your opportunities, gives you TONS more options and is not dependent upon daylight or weather. What I have done here simply cannot be done with just natural light. Well, I suppose in theory, one could replicate this, but not easily or quickly and not without an assistant or two.
[blockQuote position="right"]...we used this session JUST for what I guess we could call their”beefcake” images?[/blockQuote]
Here is the setup for the low key lighting. Low key is usually defined as an image in which the darker tones predominate and it is the highlights that defines the image. I do not want to get into hair-splitting on the definitions of Low/High Key, but for the purpose of this blog post: Low Key = Darker and High Key = Lighter

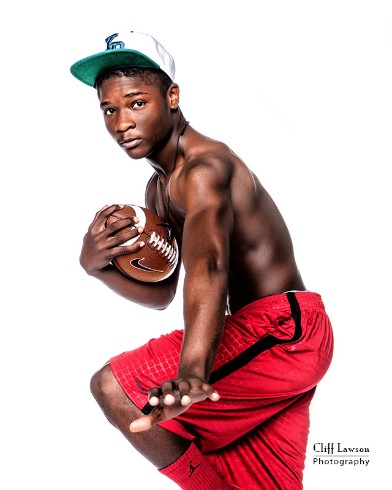
Just three lights—two 12x60 strip banks with the egg crate grids and one 22-inch beauty dish with a 30 degree honeycomb grid. These three lights with the associated grids really puts the light where it is wanted with extremely little spill and no lens flare.
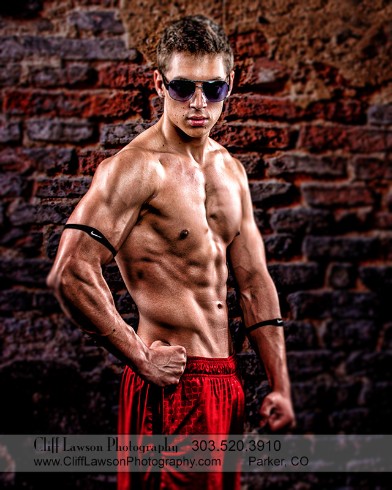
I did move the beauty dish around a bit to change the lighting from relatively flat to a position that gave a bit more dimension, but that dish was never too far from the lens axis. In this first image, the dish was directly over the camera and gave us what is often referred to as “butterfly” lighting—note the small shadow below his nose that some people think looks like a butterfly. While this lighting tends a bit toward the flat, it is high enough to still give us some defining shadows.

With Image #2, the dish is moved over to camera right a bit and tilted up to allow his left arm and lower part of his body to go dark. The narrow beam created by the honeycomb grid gives a narrow, but still smooth, transition from the highlight to shadow. Note that very little light hits the background.

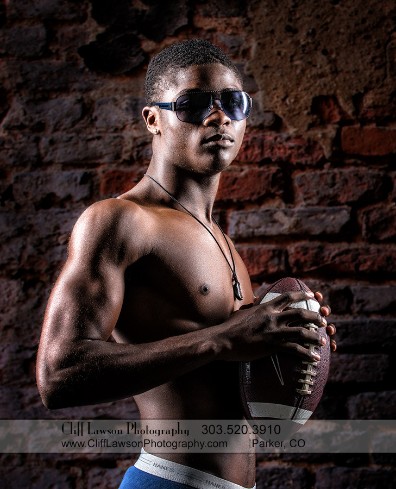
In Image #3—holding the football—I turned the dish off and just lit him with the two 12x60 strips. No front fill at all so this really accentuates his arms. I’m not nuts about the sunglasses for this one, but it is what he wanted.
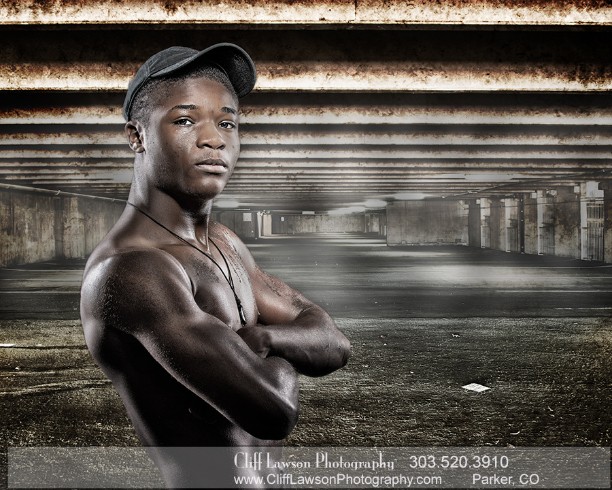
For number 4, he is turned a bit more and the majority of the light is from the two strips and the dish power is reduced a bit and aimed high to just hit his face.
For the final low key example, I had him step back just a little bit to allow the strip lights to also illuminate his front a bit while still giving a strong side-light effect. The beauty dish was turned off and the background lit by a Nikon SB-800 placed behind him and fired in the optical slave mode.
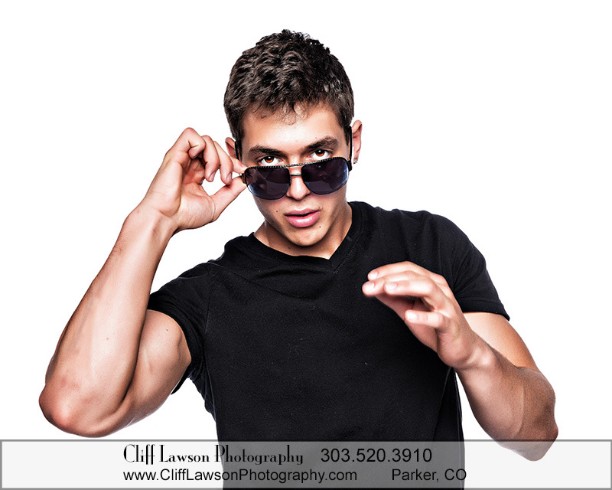
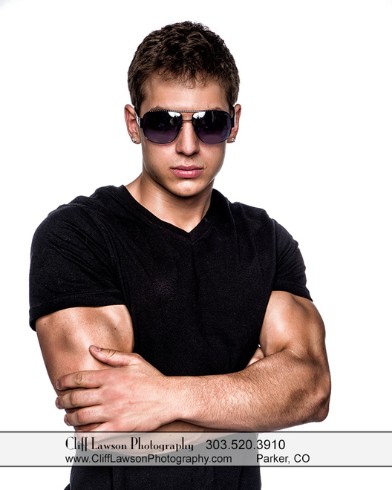
After about an hour of the dark background images, we move to the white seamless for some high-key work. To be more technically correct, this is more mixed key as the subject is still relatively dark while the background is a blown out white. But generally, most people refer to the blown-out white background as high key.
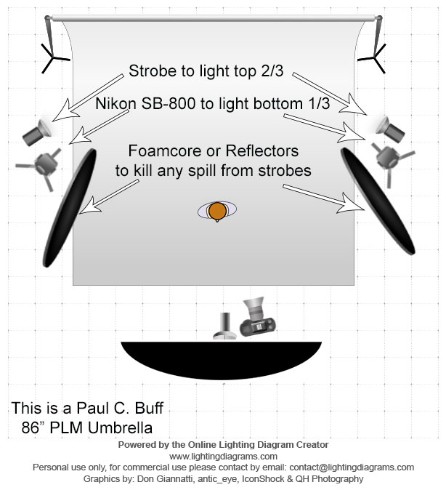
Here is my lighting setup. The background is lit by two lights on each side—one Alien Bee 400 with the standard 7” reflector and one Nikon SB-800. The Bee lights the top 2/3 or so and the speedlight just fills in a bit at the lower portion to ensure everything gets plenty of light. I do NOT want to get dirty grays. It can be cleaned up in Photoshop, but this avoids the aggravation. Main light in this case is a single Paul C. Buff 86” PLM umbrella with front diffuser. This belongs to the studio and comes with the rental. Pretty cool!
Incidentally, these were fired with just two Pocket Wizard PlusIII units—the transmitter on the camera and one receiver on one Alien Bee. Everything else fired from each unit’s optical slave function—speedlights included.
The background is metered with my Sekonic 758 to read f/11 or f/16 and the reading should be within ½ to 2/3 stop across the background. The subject is then metered at at least 1 stop less than the background but not more than 2 stops. Less than that and the subject looks muddy and more than that can cause “blooming” around the subject. Sometimes that blooming is desirable, especially with women in a “fashion” look, but not here.
It is important to block any spill from the lights illuminating the background so that any spill does not contaminate the subject, so I use reflectors or cards or matboard to block any light that might give me a problem.
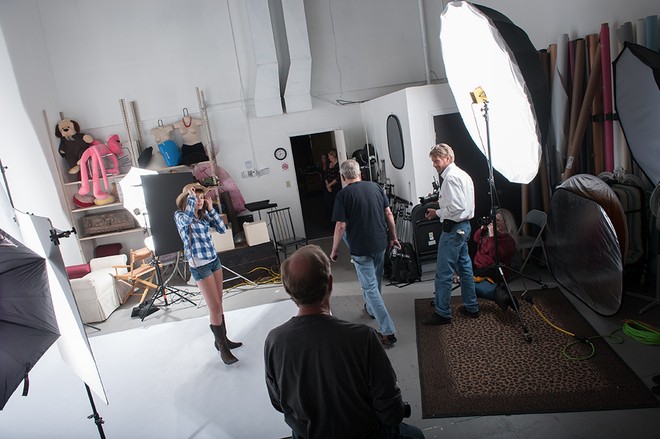
Here are two images. This first is a diagram of the setup and the second is a pull-back I did from I class I taught a few years ago and it gives you a general idea of the arrangement for the white seamless images and you can see the size of the PLM. Look closely and you will see a speedlight just below the studio strobe and the black foamcore used as a spill-killer. In this image I used a small umbrella to light the seamless.
With the images on the seamless, the lighting never changed. It is IMPORTANT that you mark the spot where the subject needs to be placed as small movement toward or away from the main light will change your exposure. Just 12” to 18” fore or aft from that big main light will cause underexposure or blown highlights on your subject. Even less movement is noticeable. [If this seems strange, see the Inverse Square Law for why this happens.] You REALLY need to maintain that 1 to 2 stop exposure difference between the BG and subject.
So here are some images from this part of the session. I just them play around and while I made a few position suggestions, I let them do what they wanted.
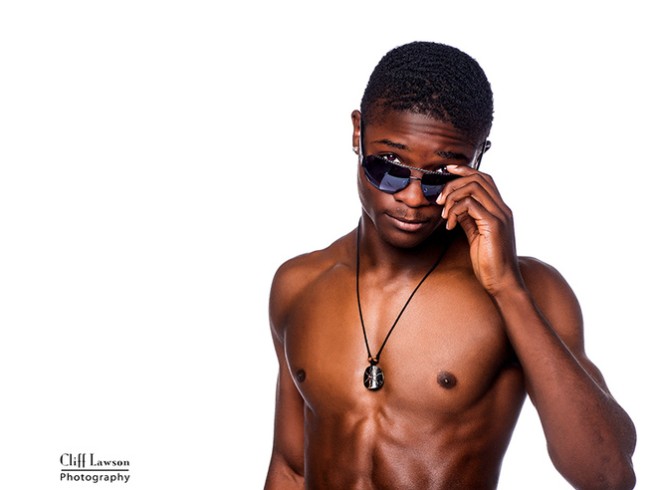
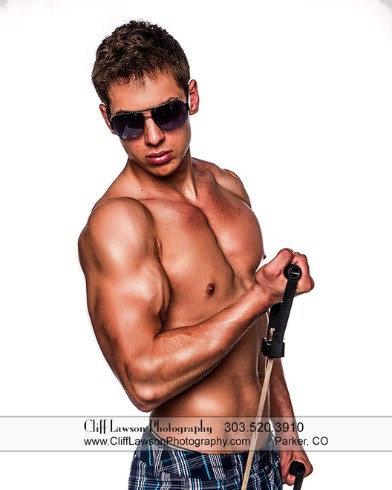
As you probably guessed, there is a lot of retouching here. The big thing is dodge and burn to accentuate the musculature. Dodge the highlights a bit and burn the shadows a bit. The difference is not huge, but it does make a difference.
Until next time,